


Cloud storage is convenient, but it often means handing file access, storage limits, and account control to a third-party provider.
Self-hosting Nextcloud offers another option: running your own private cloud on a server that you control. With the right setup, you can securely store, sync, and access files from a browser, desktop client, or mobile device without needing a paid Nextcloud subscription.
This guide walks through how to self-host Nextcloud on an Ubuntu VPS using Nextcloud All-in-One (AIO), from preparing the server to accessing your working instance.
If you use a Cloud VPS from Delta.BG, you can install Nextcloud directly from our Marketplace without going through all the steps of the initial implementation manually.
Conclusion
To self-host Nextcloud, install Nextcloud All-in-One (AIO) with Docker on a server you control, such as a VPS, home server, NAS, or virtual machine. For public access, set up a hostname with HTTPS, maintain enough storage for files and backups, and keep the server up to date. Secure administrator access, restrict the AIO management interface, and regularly test off-server backups.
What Is Nextcloud and How Does Self-Hosting Work?
Nextcloud is open-source software that lets you create a private cloud to store, sync, share, and manage files. It also includes tools for calendars, contacts, collaborative documents, video calls, and team communication through optional apps.
When you self-host Nextcloud, you install the software on a server you control rather than using a third-party cloud storage service. In this guide, that server is a VPS. Your VPS runs the Nextcloud application and stores its data, while you and other authorized users connect through a secure web address, desktop app, or mobile app.
This approach gives you greater control over where your files are stored and how you configure the instance. It also means you are responsible for keeping the server up to date, securing access, monitoring storage, and maintaining reliable backups.
What You Need Before Self-Hosting Nextcloud
Nextcloud can run on a VPS, home server, NAS, dedicated server, or virtual machine. Before you begin, make sure you have:
- A server you can administer: You need operating-system access to install software, apply updates, review logs, and manage storage. This is typically SSH access with sudo privileges on Linux.
- Enough resources: A small personal deployment can start with 2 CPU cores, 4 GB of RAM, and SSD storage. More users, larger libraries, previews, document editing, or video calls require more capacity.
- Storage headroom: Account for the operating system, Docker images, database, updates, backups, and your files, not just the data you plan to upload.
- A hostname for public access: Use a domain or subdomain, such as cloud.example.com, for trusted HTTPS. Nextcloud AIO can also create a free *.dedyn.io hostname through deSEC.
- A suitable network setup: In a standard public AIO configuration, Nextcloud must be accessible on port 443. Port 80 is required in certain configurations-for example, for the automatic issuance of a certificate for the AIO interface on port 8443. Different settings are required when using a reverse proxy, a tunnel, or a private network.
- A backup plan: Keep at least one backup separate from the Nextcloud server. Self-hosting gives you control, but you are responsible for recovery.
Self-Hosting Nextcloud With Docker and Nextcloud AIO
Step 1: Connect to the VPS
Find the server’s public IP address in your VPS provider dashboard. Then connect through SSH from Terminal, PowerShell, or another SSH client:
ssh root@YOUR_SERVER_IP
Enter the password or confirm your SSH key when prompted.
Step 2: Update the server
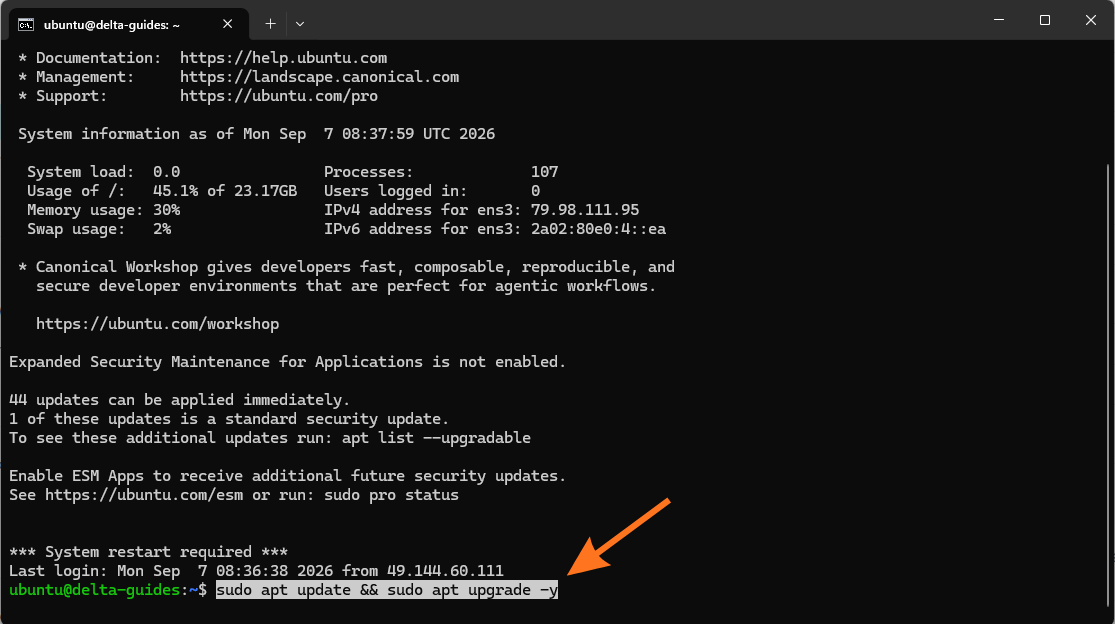
Update Ubuntu’s package list and install available updates before adding Docker or Nextcloud:
sudo apt update && sudo apt upgrade -y
Step 3: Check whether ports 80 and 443 are already in use
Nextcloud AIO needs ports 80 and 443 for certificate validation and secure web access. Check whether another service is using them:
sudo ss -tulpn | grep -E ':80|:443'
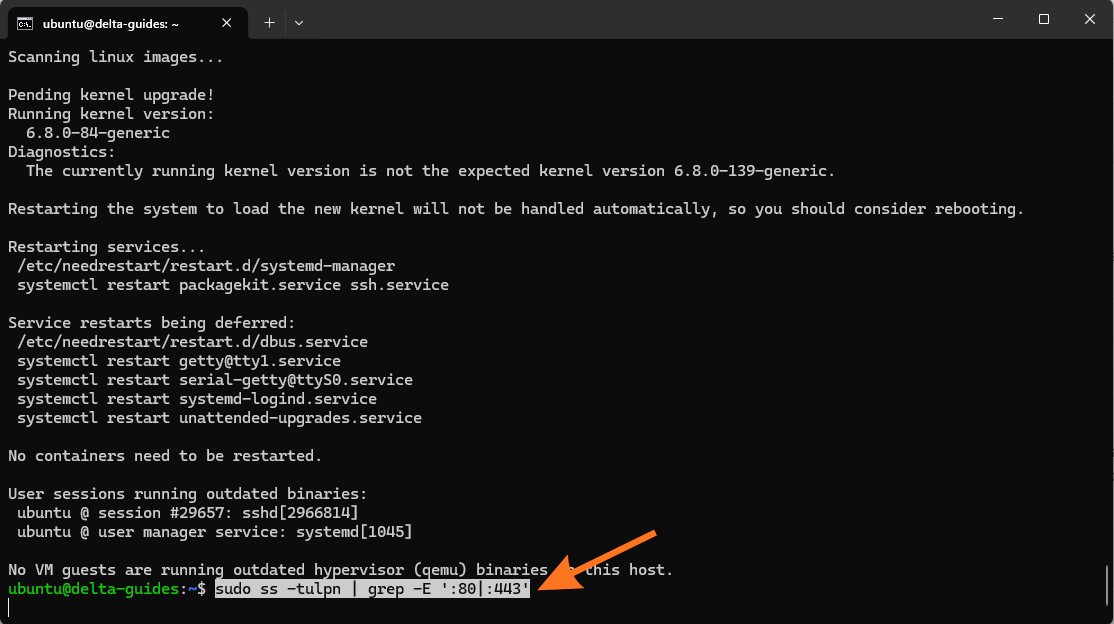
If the command returns no output, those ports are likely available.
If you see Nginx, Apache, Caddy, or another process, don't run the standard AIO setup command yet. That means the VPS already has a web service or reverse proxy configured, and AIO needs its own separate reverse proxy configuration.
Step 4: Configure the firewall
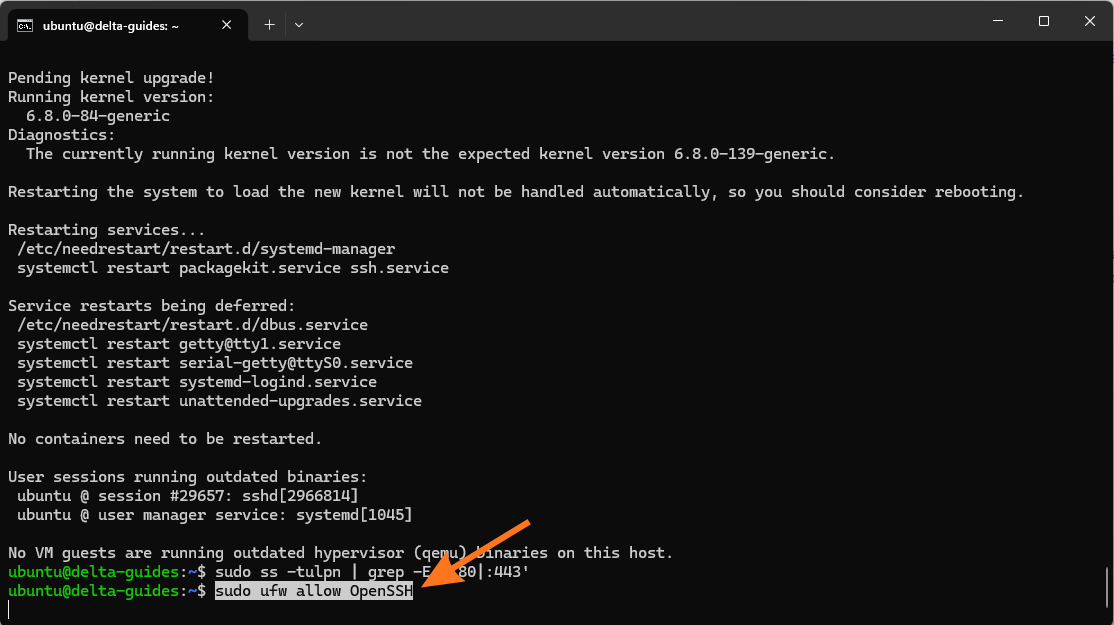
Allow SSH first, so you do not lock yourself out:
sudo ufw allow OpenSSH
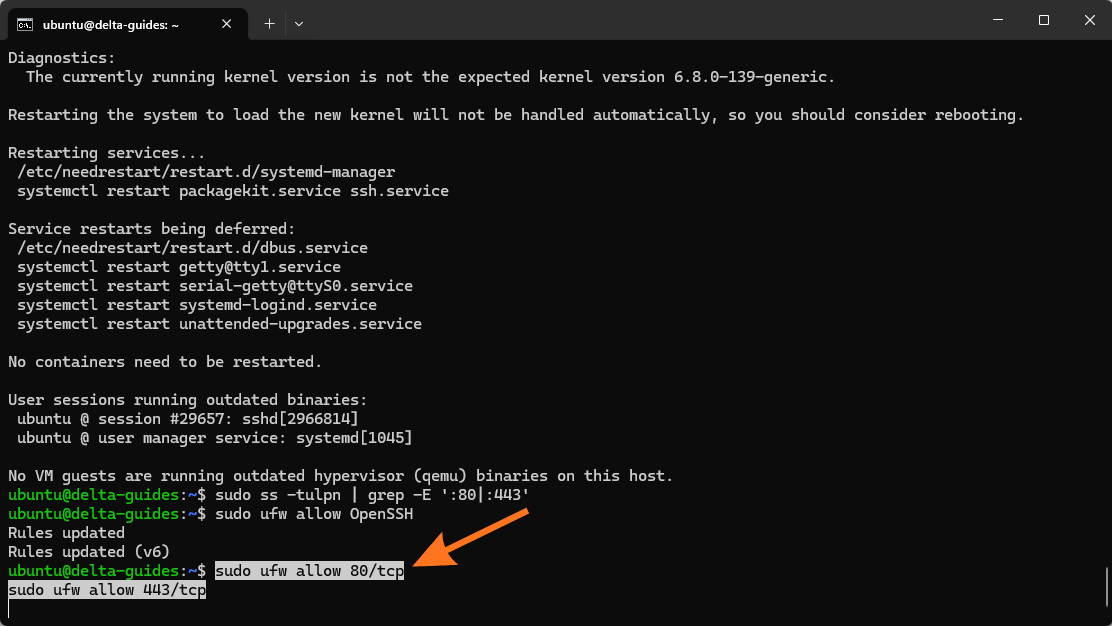
Allow HTTP and HTTPS for Nextcloud:
sudo ufw allow 80/tcp
sudo ufw allow 443/tcp
Enable the firewall and confirm the active rules:
sudo ufw enable
sudo ufw status
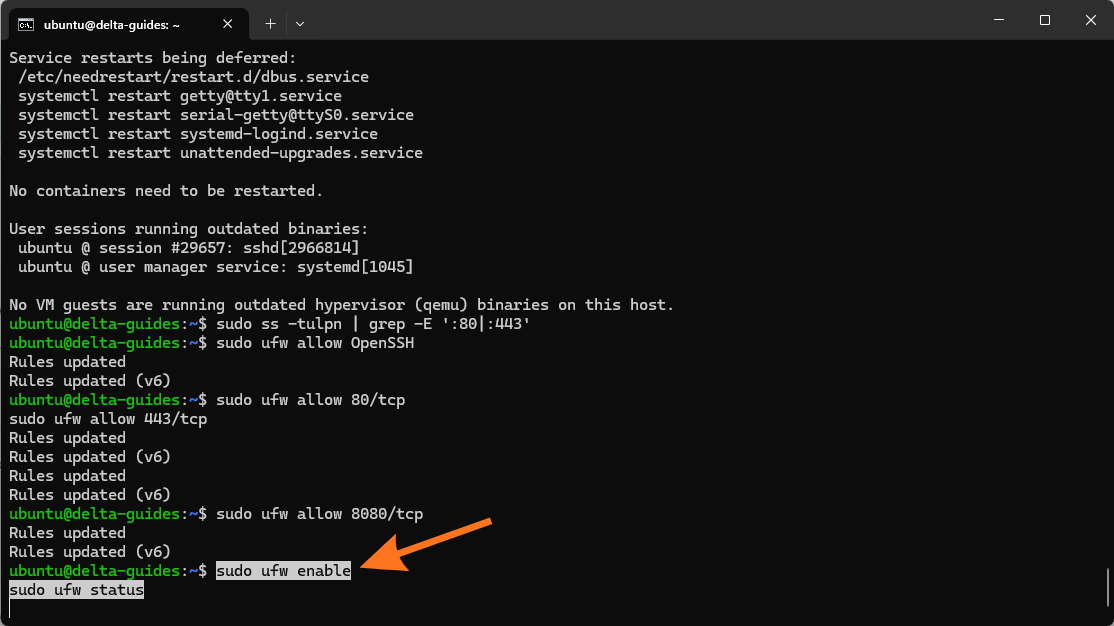
The Nextcloud AIO management interface uses port 8080. Be aware that Docker-published ports can bypass normal UFW filtering because Docker manages its own firewall rules. Do not rely on UFW alone to restrict access to the AIO management interface.
If possible, restrict access to port 8080 at your VPS provider firewall or another network layer so that only trusted IP addresses can reach it.
Step 5: Remove conflicting Docker packages
Nextcloud AIO requires Docker Engine installed from Docker’s standard packages. It does not support Snap-based Docker installations.
Remove packages that may conflict with Docker’s official installation:
sudo apt remove $(dpkg --get-selections docker.io docker-compose docker-compose-v2 docker-doc docker-buildx podman-docker containerd runc | cut -f1)
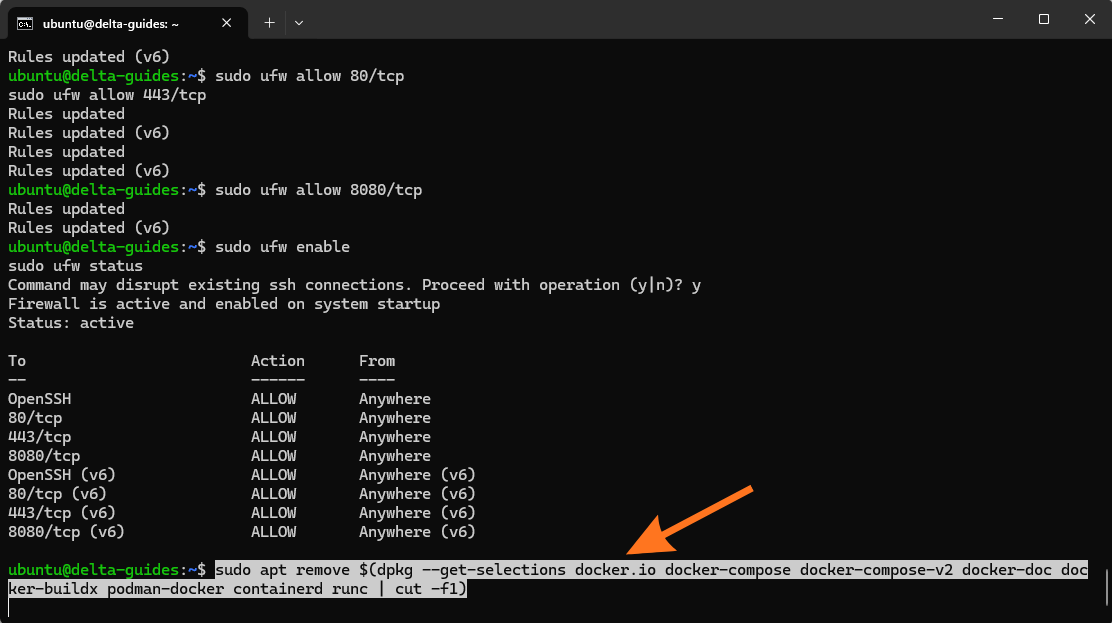
It is normal for Ubuntu to report that some of these packages are not installed.
Step 6: Add Docker’s official repository
Install the tools needed to add Docker’s signing key and software repository:
sudo apt install -y ca-certificates curl
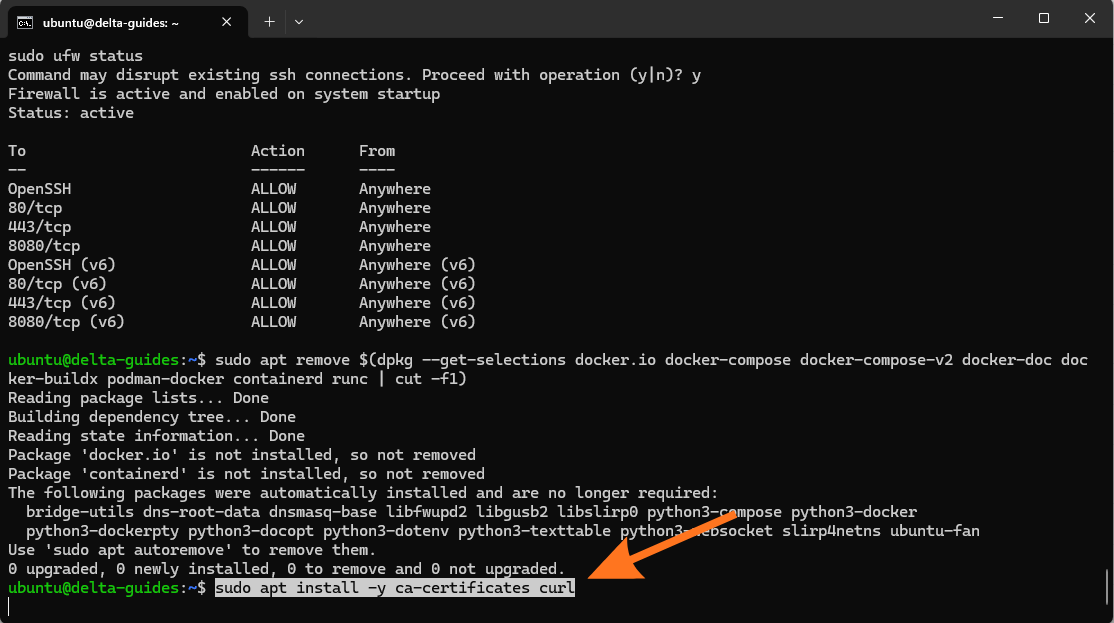
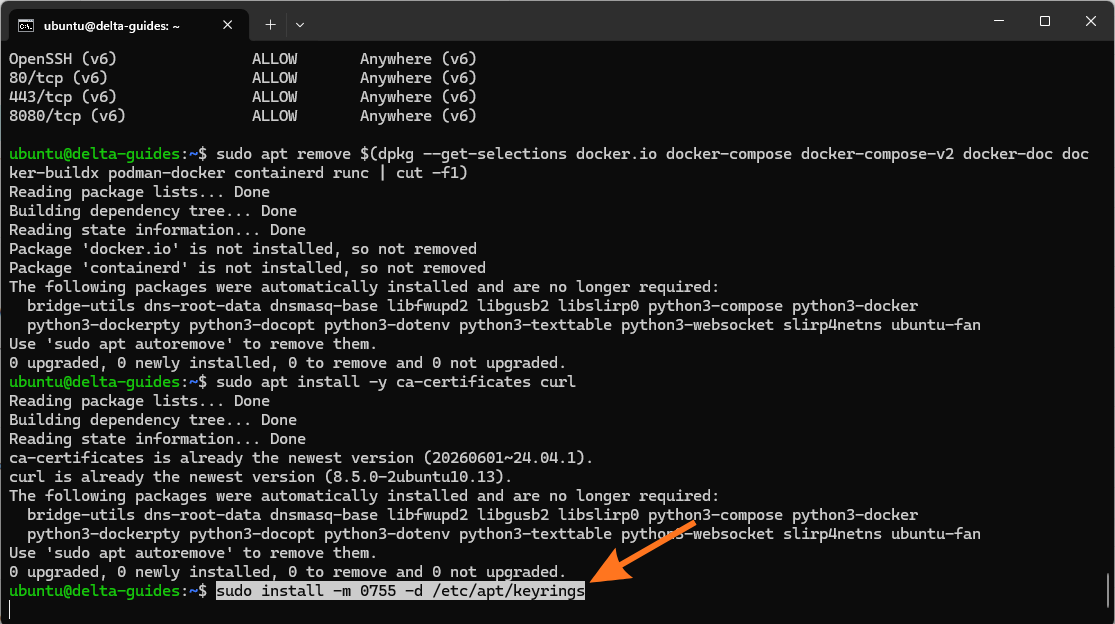
Create the directory for repository keys:
sudo install -m 0755 -d /etc/apt/keyrings
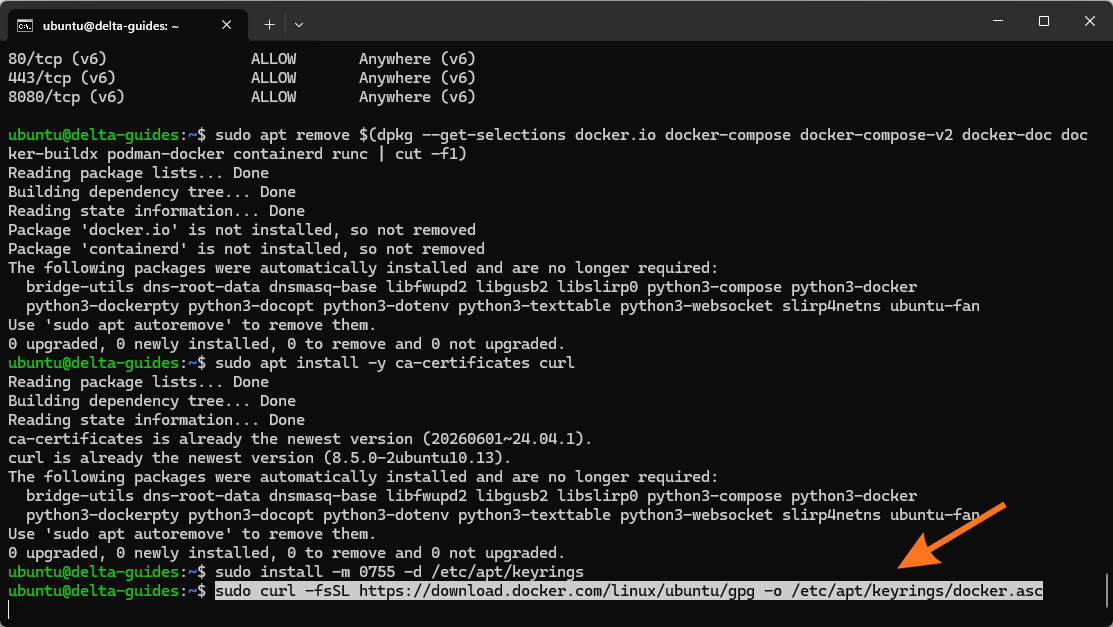
Download Docker’s GPG key:
sudo curl -fsSL https://download.docker.com/linux/ubuntu/gpg -o /etc/apt/keyrings/docker.asc
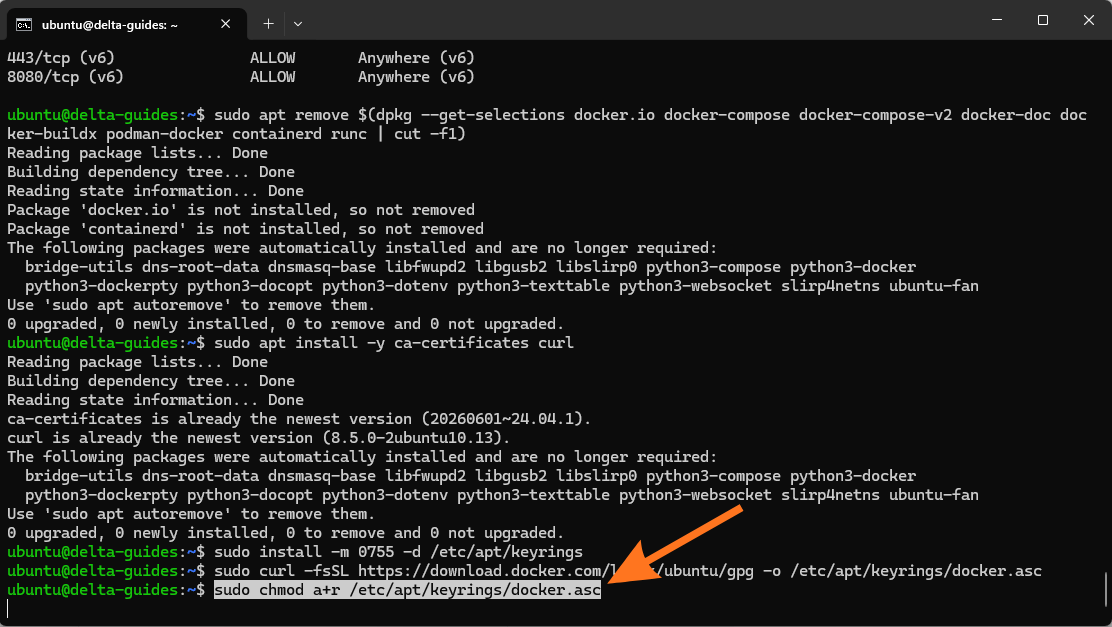
Make the key readable:
sudo chmod a+r /etc/apt/keyrings/docker.asc
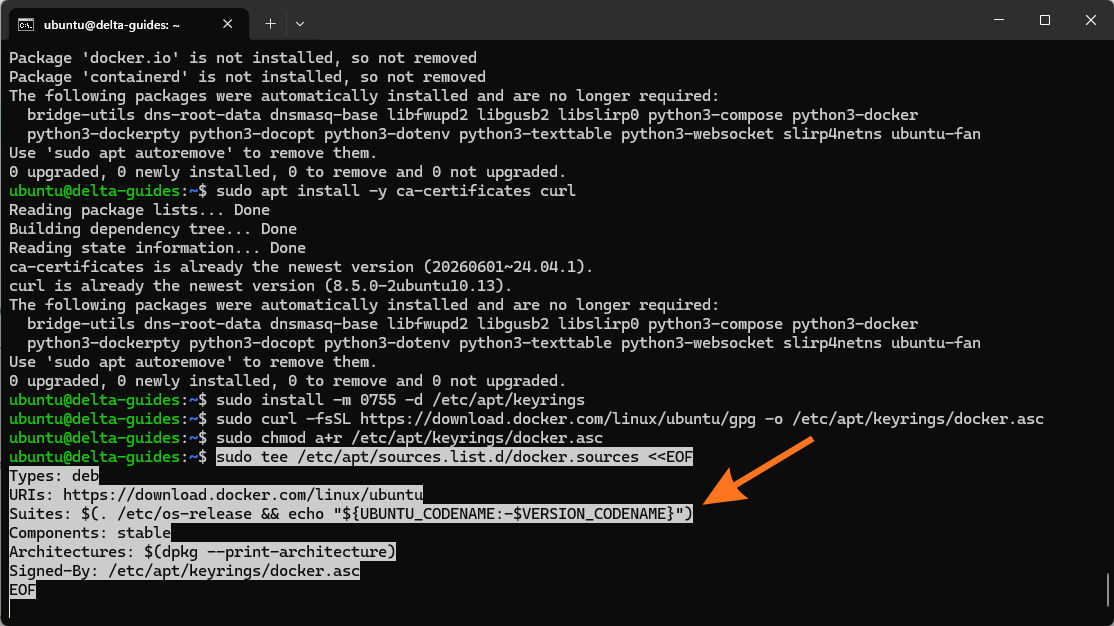
Add Docker’s stable repository:
sudo tee /etc/apt/sources.list.d/docker.sources <<EOF
Types: deb
URIs: https://download.docker.com/linux/ubuntu
Suites: $(. /etc/os-release && echo "${UBUNTU_CODENAME:-$VERSION_CODENAME}")
Components: stable
Architectures: $(dpkg --print-architecture)
Signed-By: /etc/apt/keyrings/docker.asc
EOF
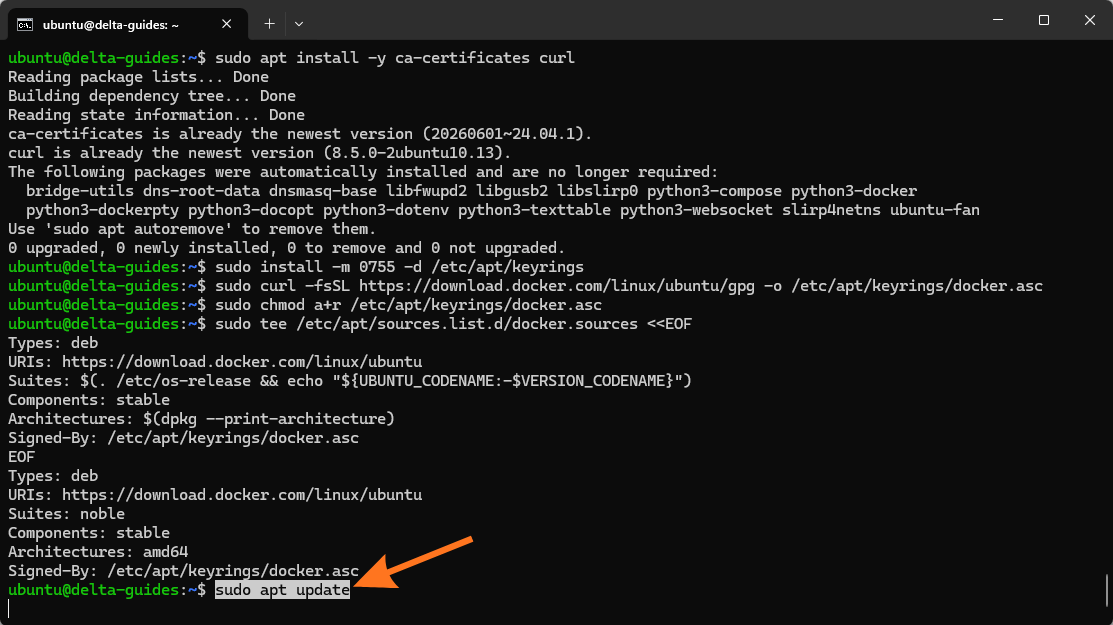
Refresh the package index:
sudo apt update
Step 7: Install Docker Engine
Install Docker Engine and the required Docker plugins:
sudo apt install -y docker-ce docker-ce-cli containerd.io docker-buildx-plugin docker-compose-plugin
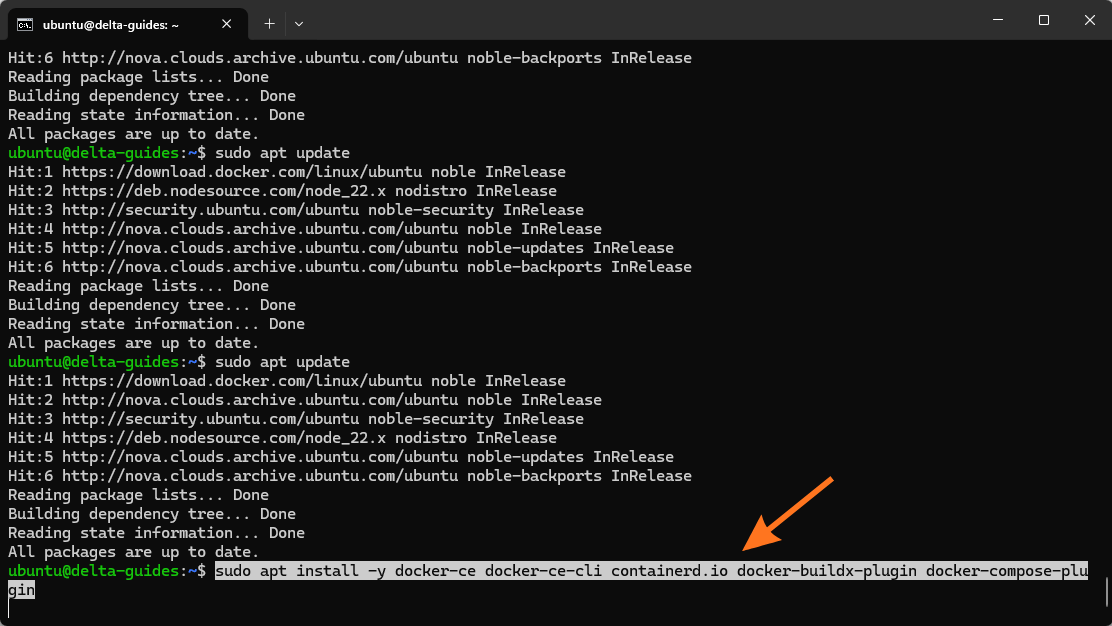
Run Docker’s test container to confirm the installation:
sudo docker run hello-world
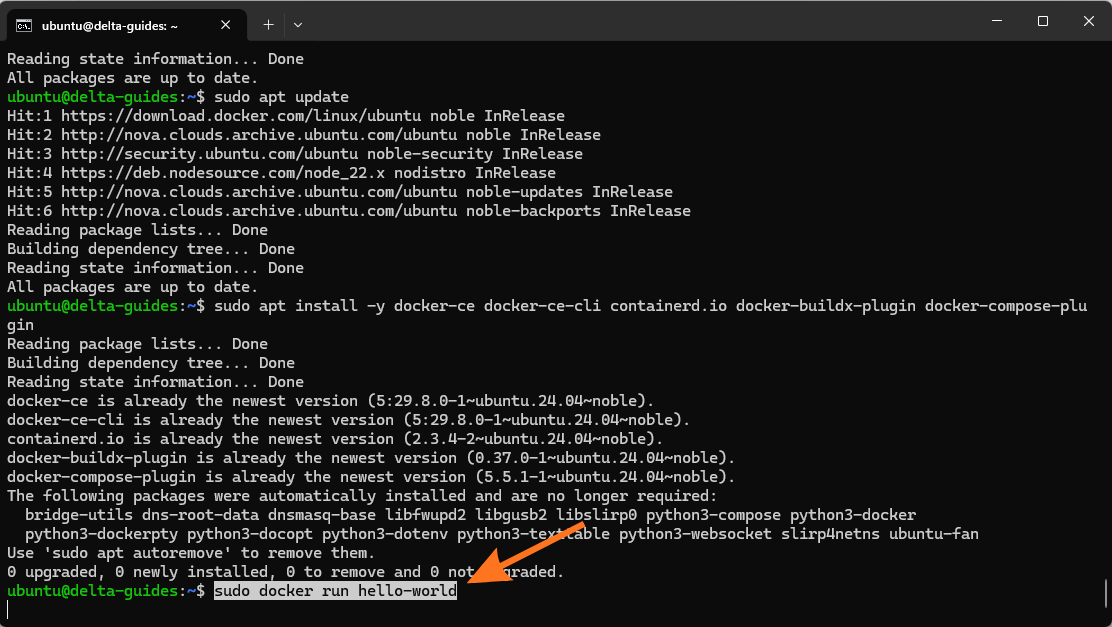
If the command returns a “Hello from Docker!” message, Docker is ready.
Step 8: Start the Nextcloud AIO master container
Run the official Nextcloud AIO command:
sudo docker run \
--init \
--sig-proxy=false \
--name nextcloud-aio-mastercontainer \
--restart always \
--publish 80:80 \
--publish 8080:8080 \
--publish 8443:8443 \
--volume nextcloud_aio_mastercontainer:/mnt/docker-aio-config \
--volume /var/run/docker.sock:/var/run/docker.sock:ro \
ghcr.io/nextcloud-releases/all-in-one:latest
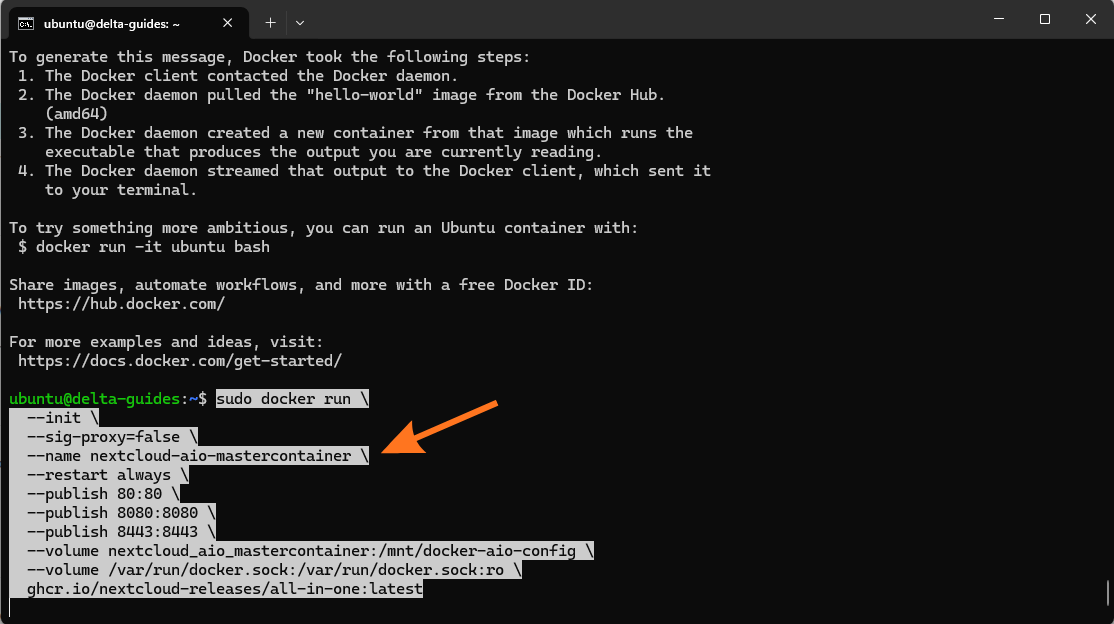
This starts the AIO master container. It will manage the other containers required for Nextcloud, including the database and web service.
Do not install a separate web server, PHP, database server, Certbot, or another Nextcloud Docker image as part of this AIO setup. Those components can overlap with what AIO manages.
Step 9: Open the AIO setup page
In a browser, open the following address:
https://YOUR_SERVER_IP:8080
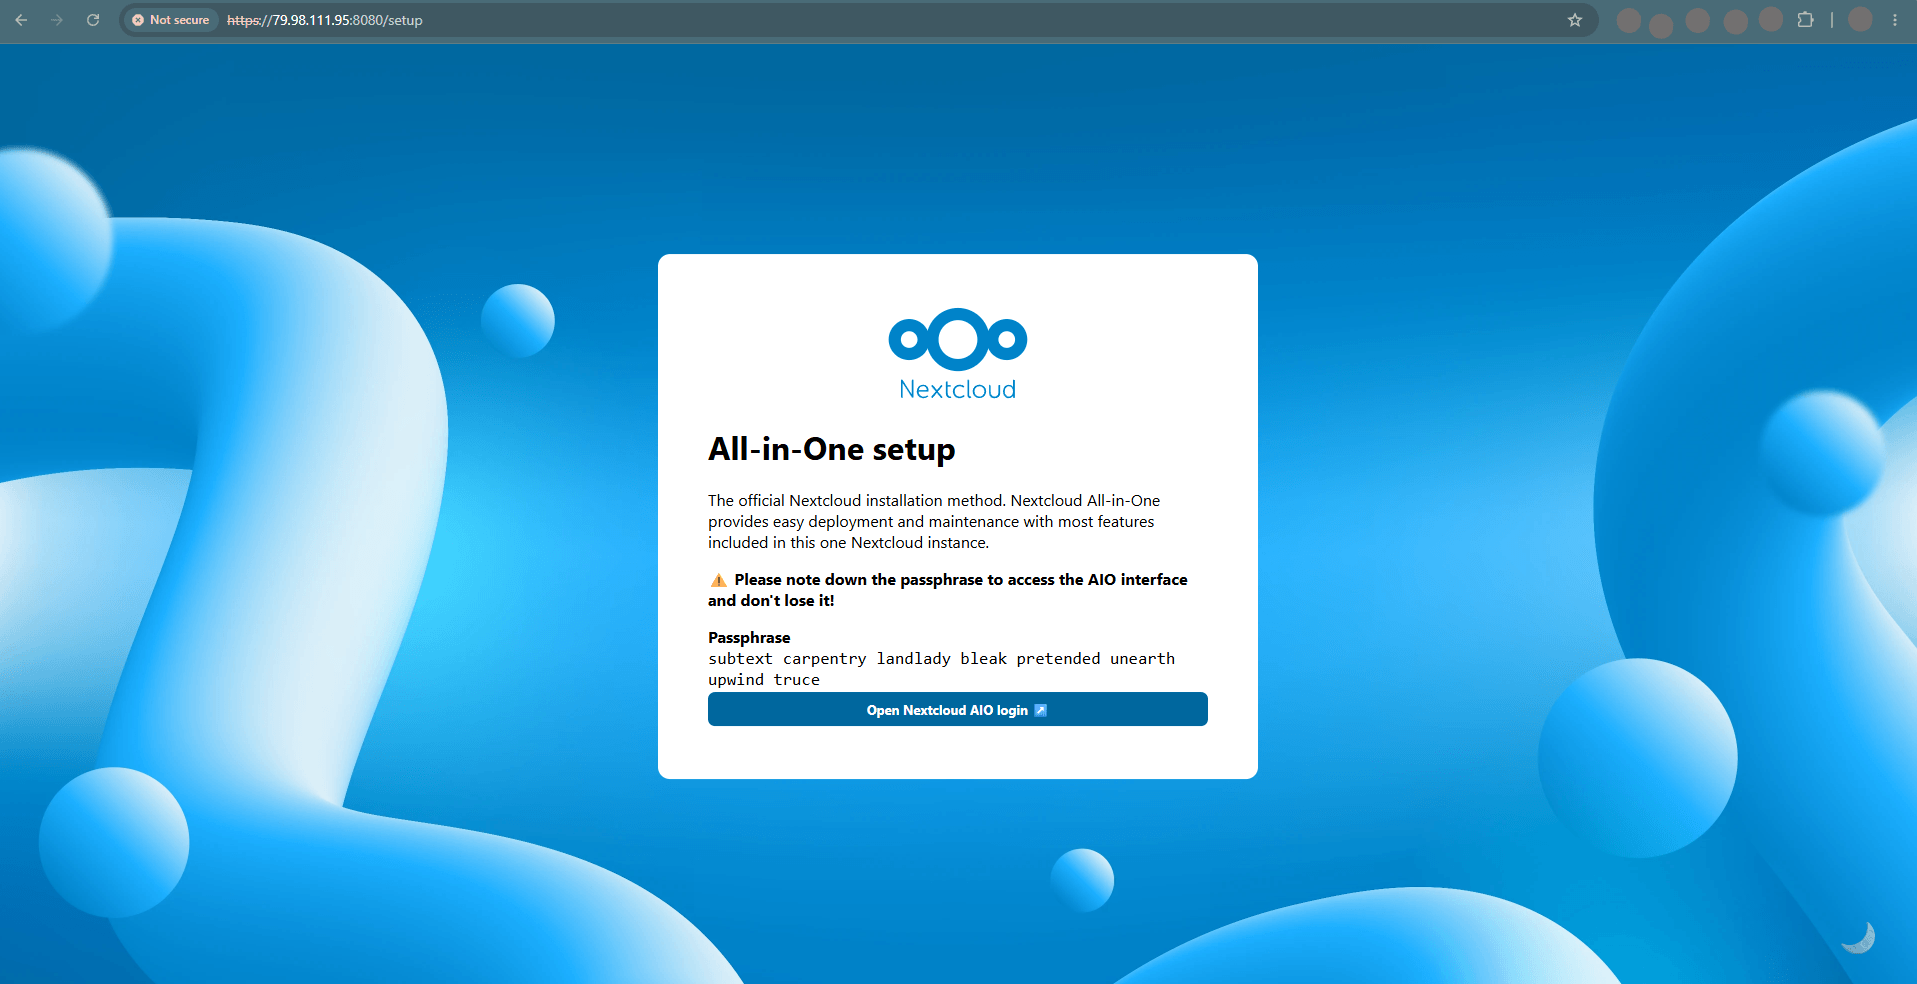
Replace YOUR_SERVER_IP with the VPS's public IP address.
The browser will show a certificate warning because this management interface initially uses a self-signed certificate. Confirm that the IP address is your VPS, then proceed to the page.
Use the server IP address for this step, not a domain name.
Step 10: Choose a hostname for Nextcloud
Nextcloud needs a hostname to use a trusted HTTPS certificate. If you already own a domain, you can use a dedicated subdomain such as:
cloud.example.com
If you do not own a domain, AIO offers a free *.dedyn.io dynamic DNS hostname via its deSEC integration. Follow the option presented in the AIO setup interface to create or configure that hostname.
The result is a public address similar to:
your-instance.dedyn.io
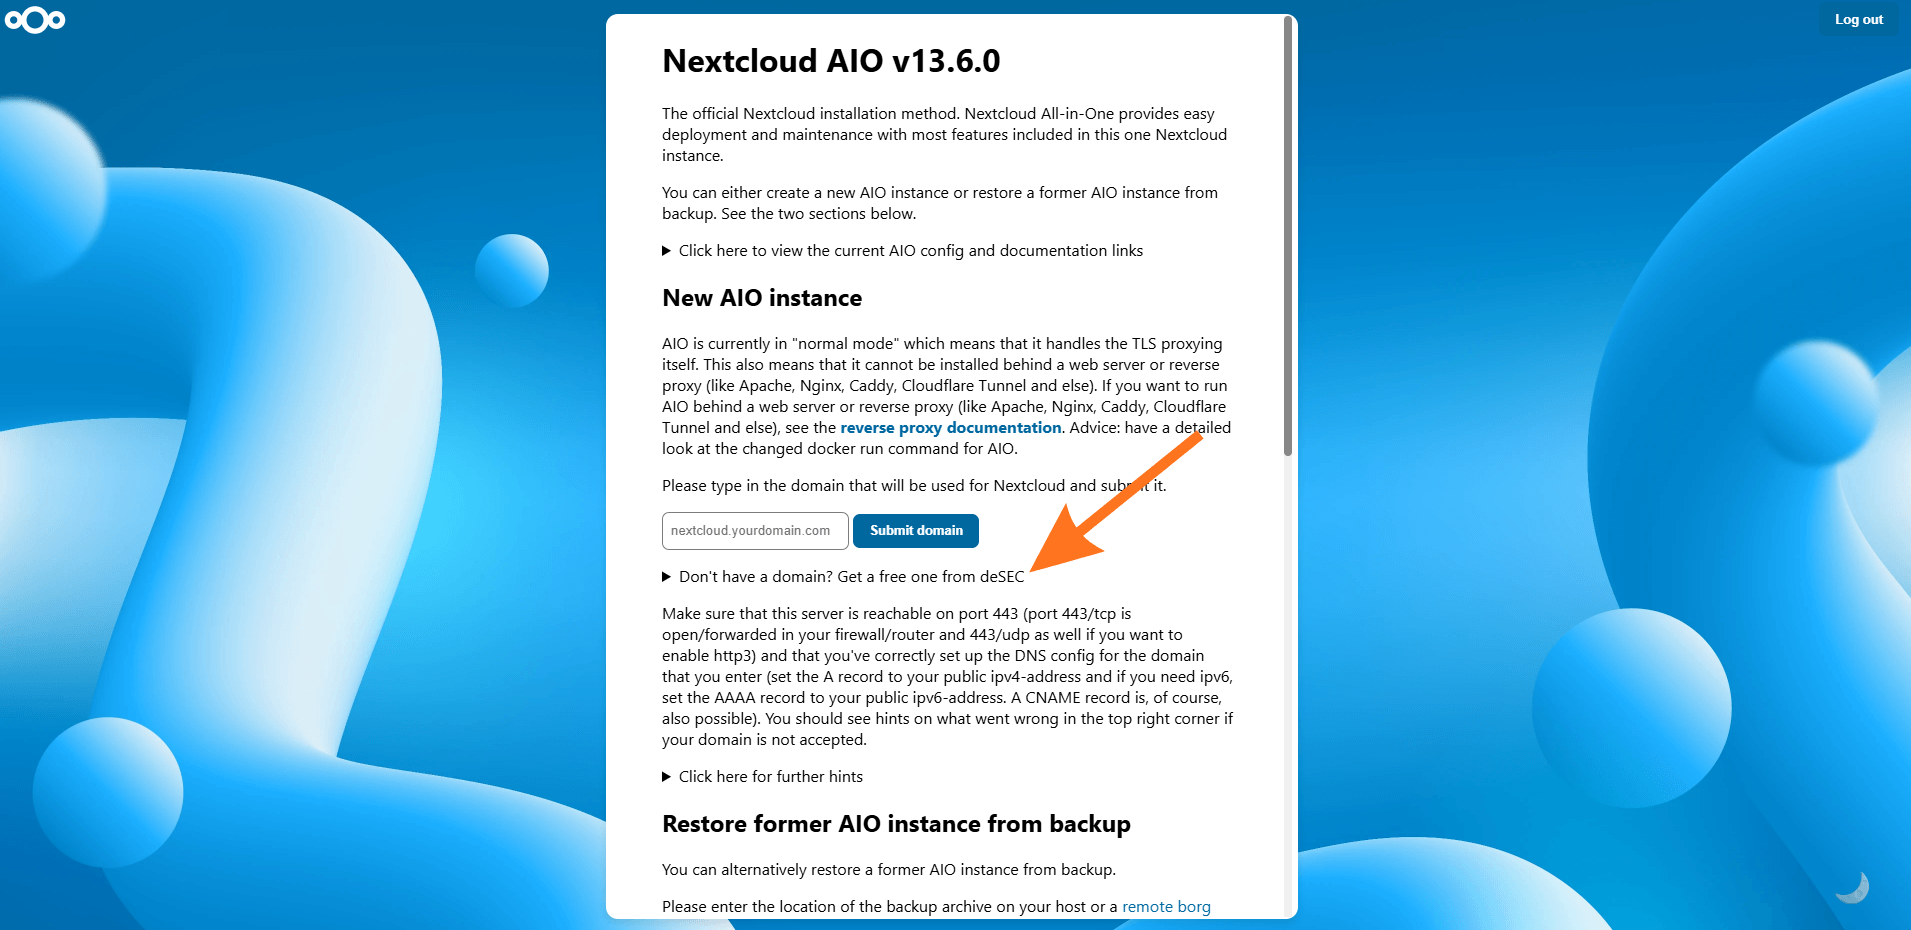
Use this hostname to access Nextcloud after setup. It must resolve to the VPS and remain publicly reachable on ports 80 and 443.
Step 11: Complete hostname and HTTPS validation
Enter the hostname you selected in the AIO interface.
AIO checks whether it can reach the VPS, then requests a trusted HTTPS certificate. This process requires:
- The hostname must point to the VPS server's public IP address;
- Port 443 must be accessible for secure Nextcloud access;
- If using the AIO interface on port 8443 with a valid certificate, ports 80 and 8443 must also be accessible;
- No other web server or reverse proxy should be using the required ports, unless AIO is configured to run behind it.
If the validation fails, confirm the hostname, firewall rules, VPS-provider firewall settings, and port availability before trying again.
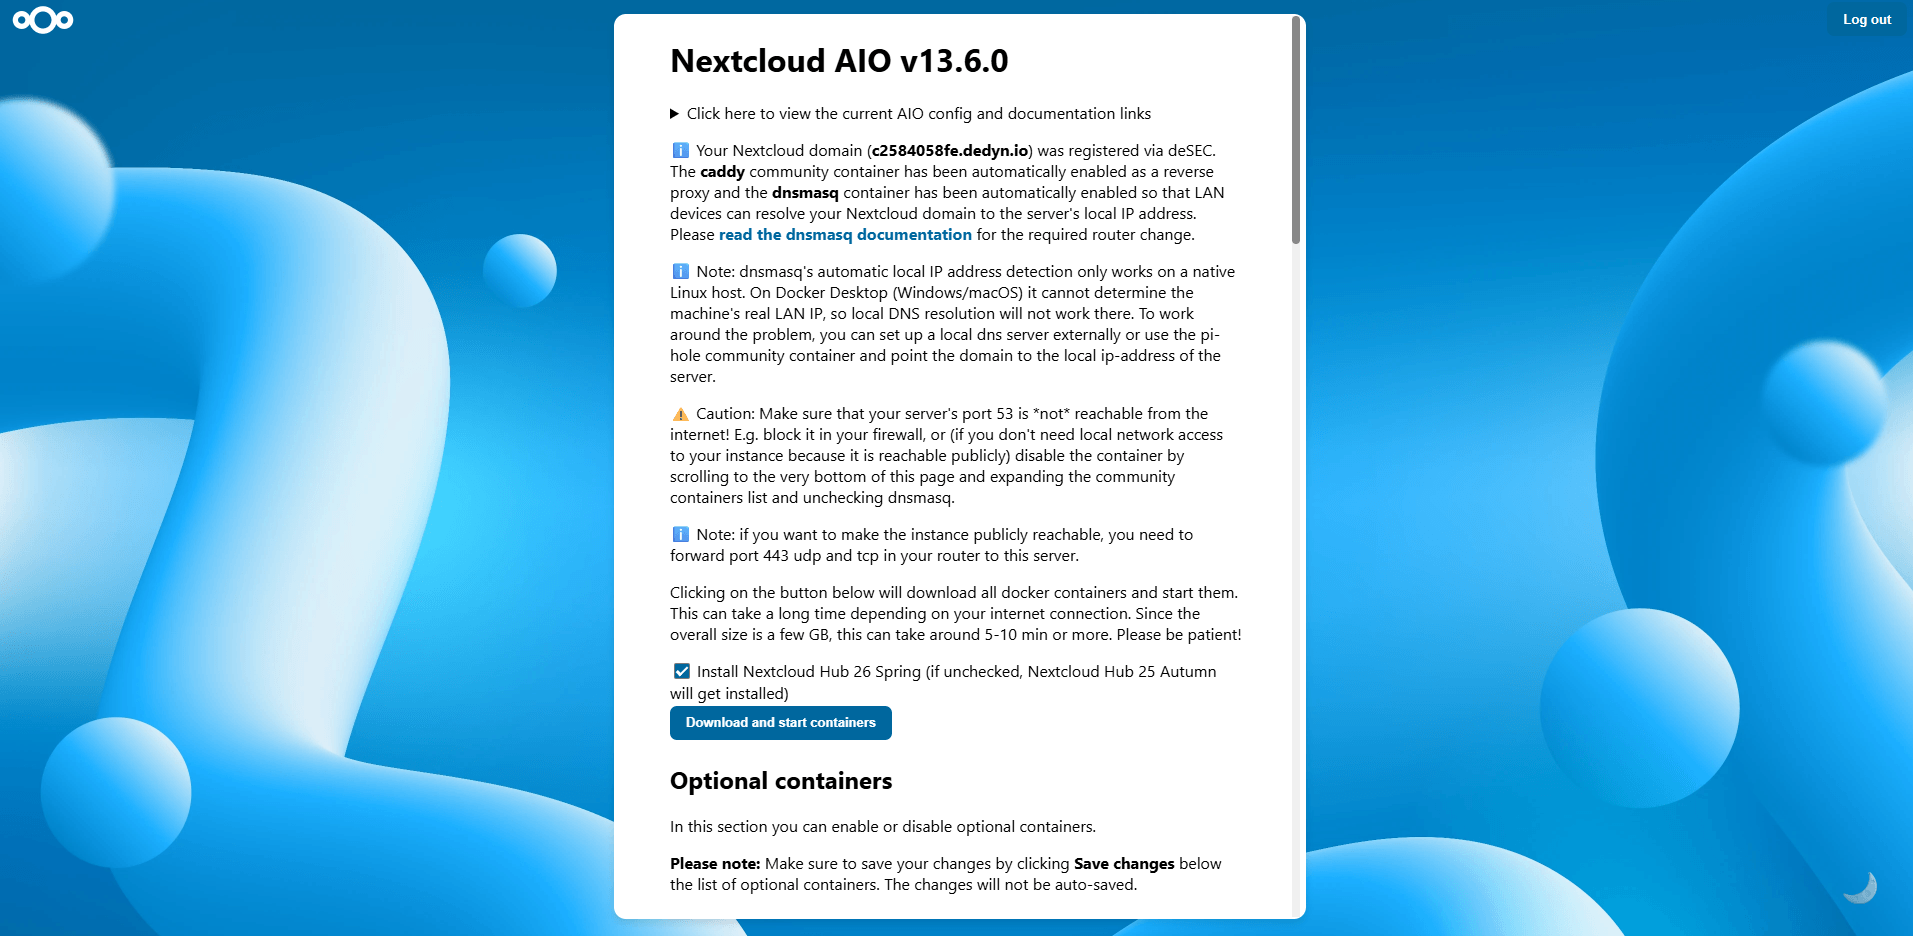
Step 12: Set the data and backup locations
By default, Nextcloud AIO stores user data in a Docker volume. If you want to use a different location for the Nextcloud data directory, specify it during the initial AIO startup using the `NEXTCLOUD_DATADIR` parameter.
You can configure the backup location via the AIO interface.
Whenever possible, use fast SSD or NVMe storage for Nextcloud data. The application performs frequent file and database write operations; therefore, disk performance directly impacts uploads, synchronization, file previews, and overall system speed.
AIO uses encrypted BorgBackup for backups. Save the backup encryption password displayed during setup in a password manager or another secure location. You will need it to restore a backup.
Step 13: Start the remaining Nextcloud containers
Finish the AIO options and start the Nextcloud containers.
AIO downloads and configures the services needed for the instance. This may take a few minutes, depending on the VPS resources and network speed.
When the setup completes, AIO will provide the permanent Nextcloud address, such as:
https://your-instance.dedyn.io
Or, if you use your own domain:
https://cloud.example.com
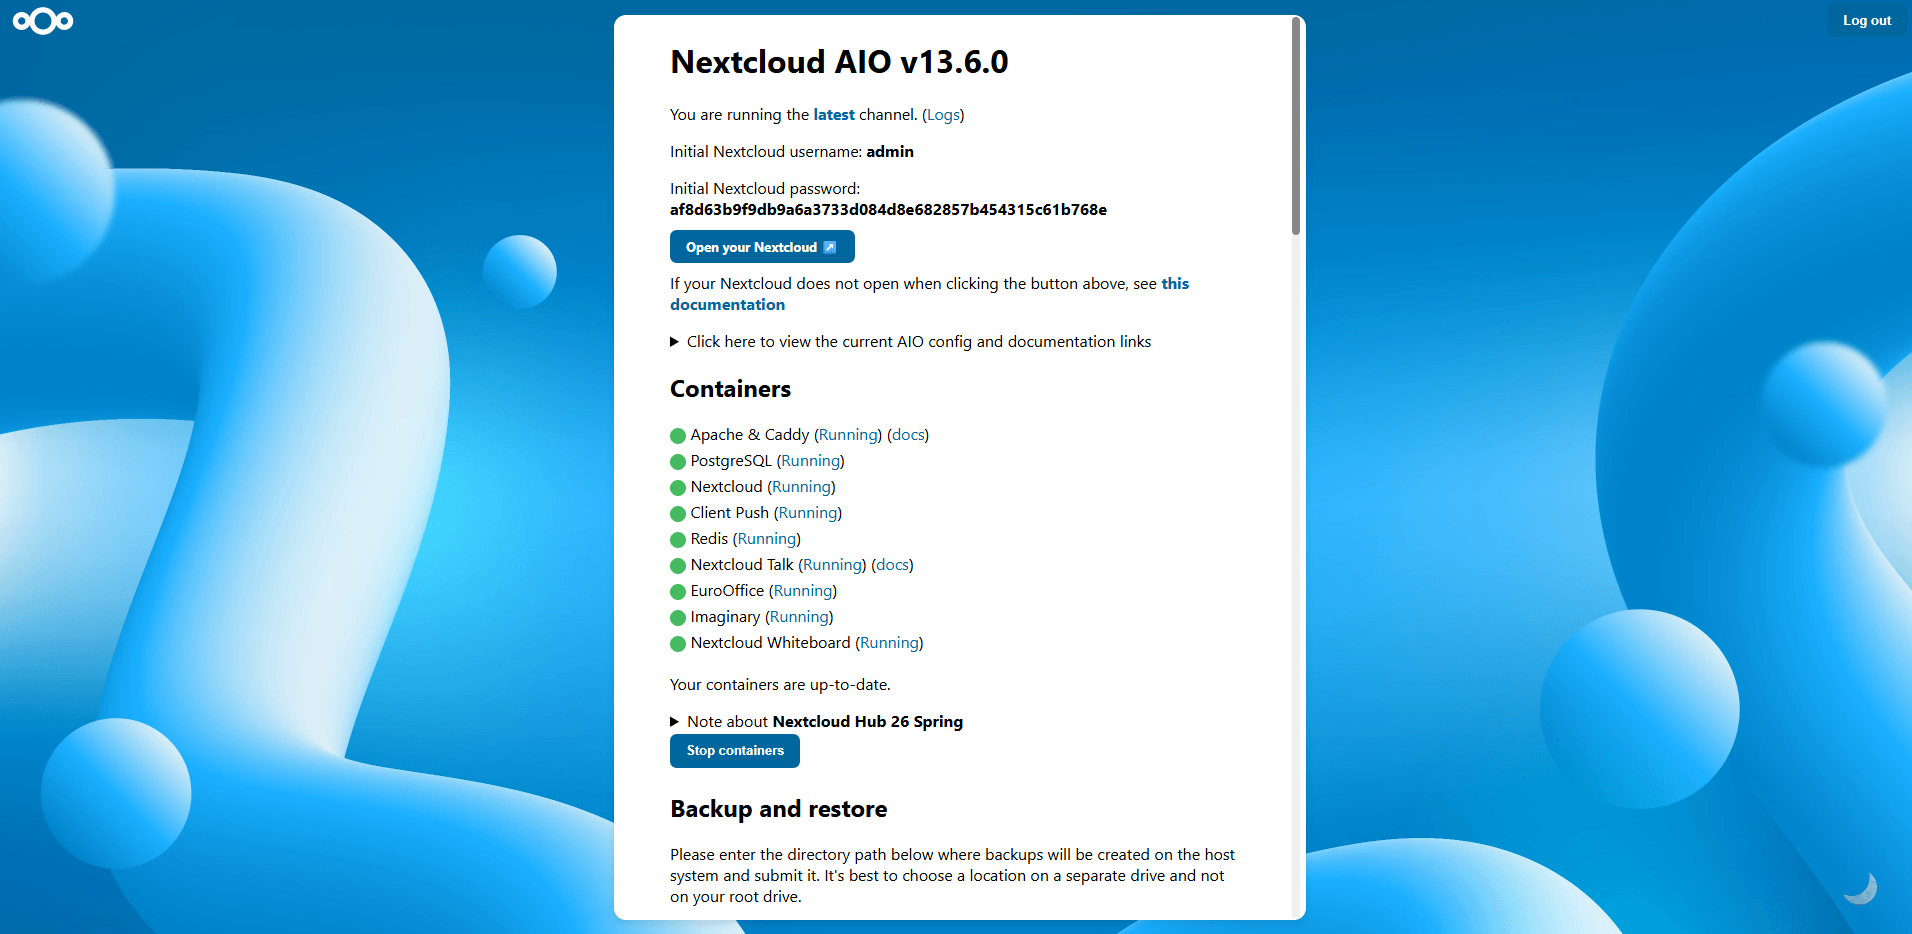
Step 14: Open Nextcloud and create the administrator account
Open the permanent HTTPS address in your browser.
Nextcloud AIO creates the initial administrator account automatically during setup. Use the administrator credentials provided by the AIO interface to sign in to Nextcloud.
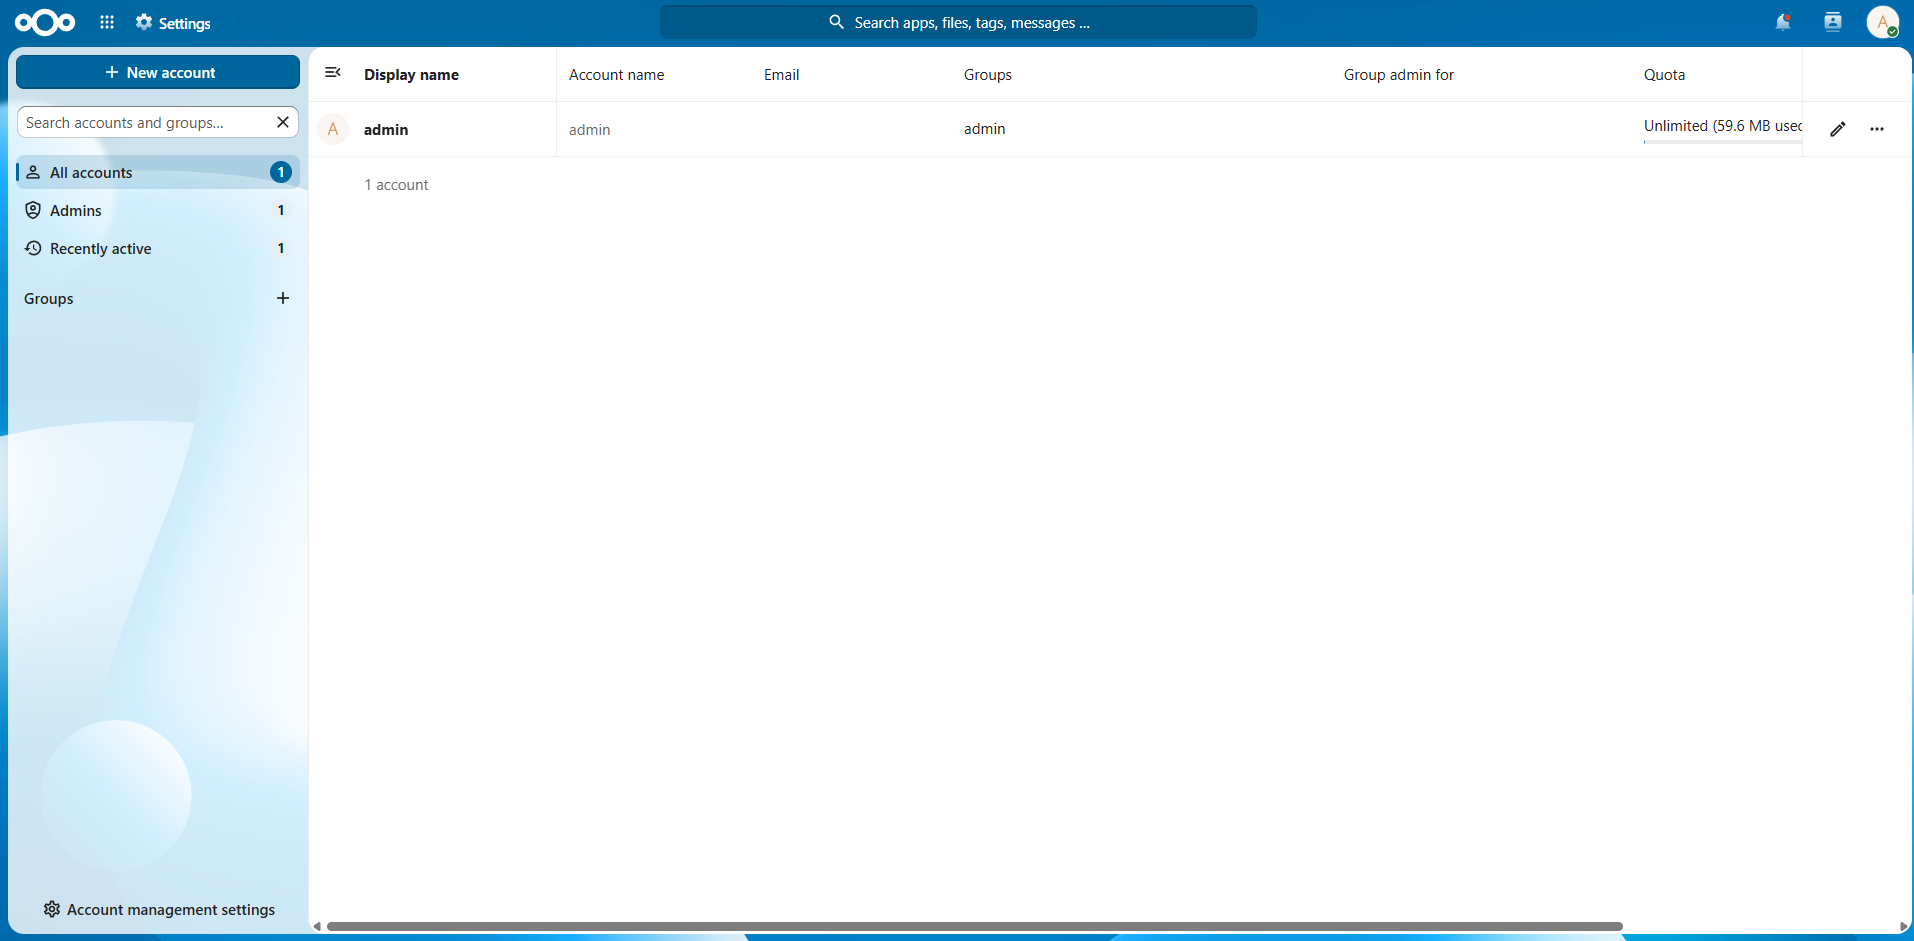
Store the administrator credentials securely in a password manager. This account can manage users, apps, storage, sharing settings, and other instance-wide configuration.
Step 15: Confirm that Nextcloud is working
After logging in, open the Files app and upload a small test file.
Then open or download the file to confirm that uploads, storage, and access are working. Also open Administration settings to review any warnings Nextcloud reports.
Your Nextcloud instance is now available through its permanent hostname:
https://your-instance.dedyn.io
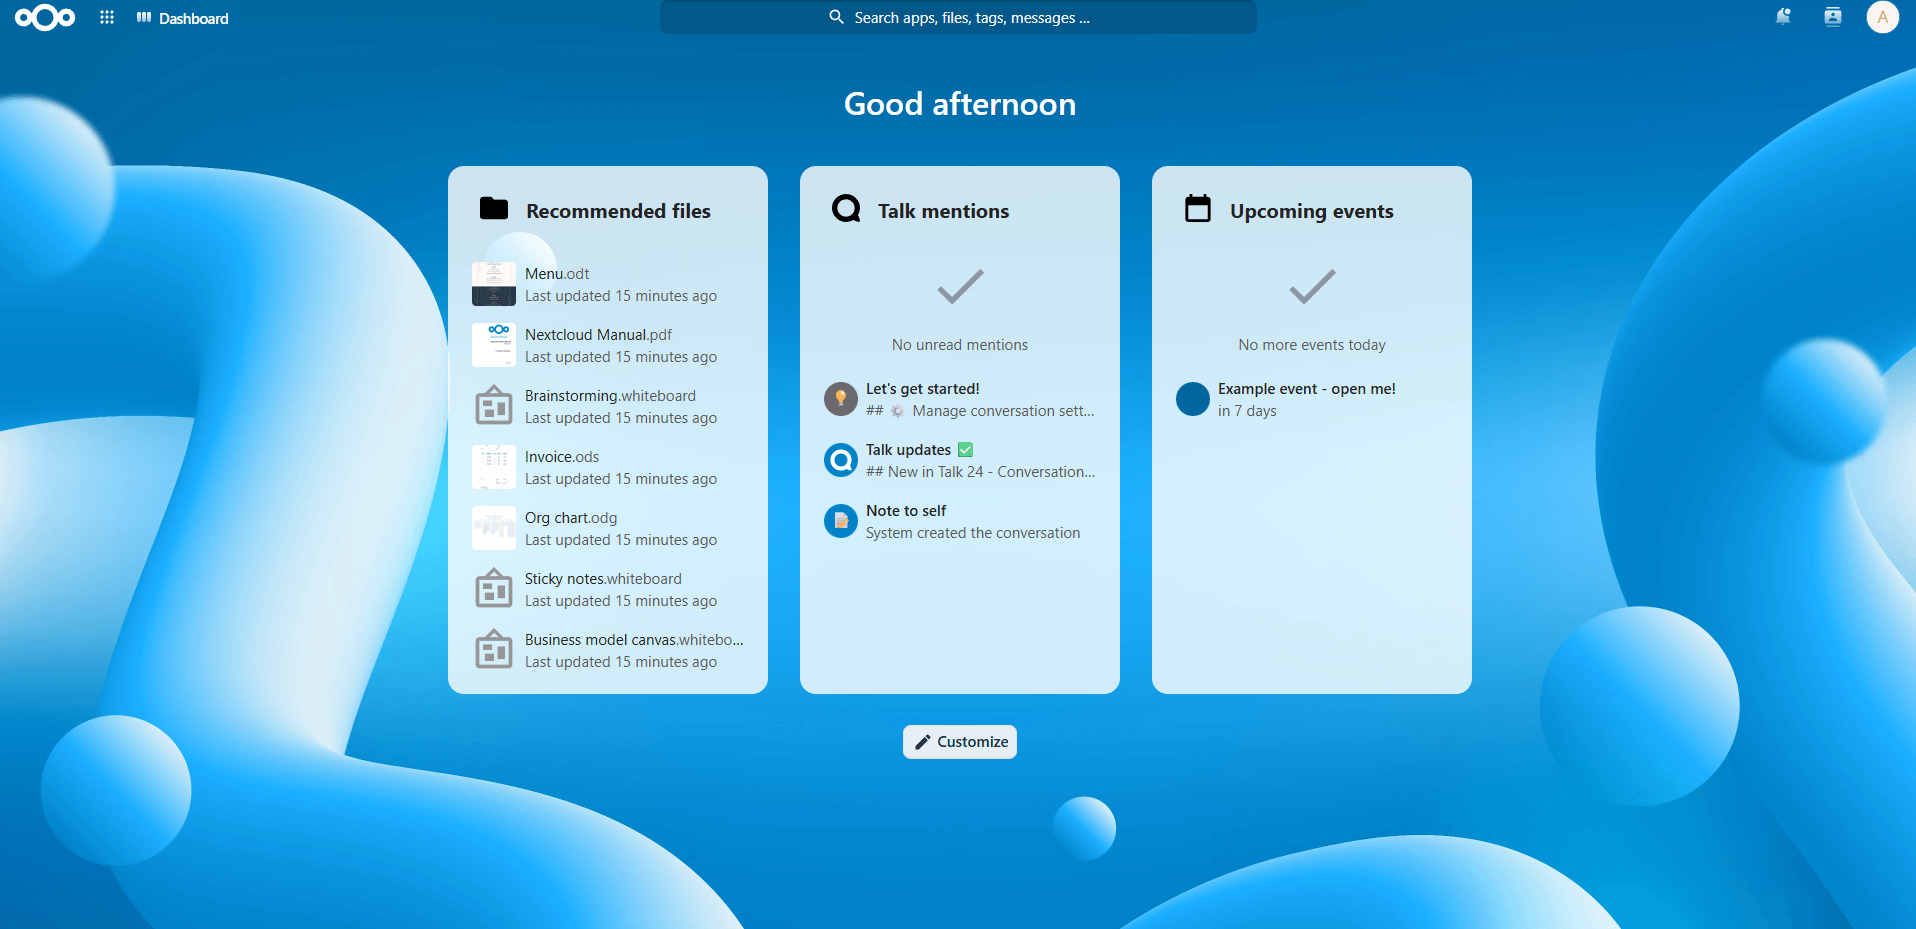
The address at https://YOUR_SERVER_IP:8080 is for managing AIO-level settings, backups, and updates. It is not the regular address for using Nextcloud.
Common Nextcloud AIO Setup Errors and How to Fix Them
Docker installation or repository conflicts
A server may already have older Docker packages, a Snap-based Docker installation, or duplicate Docker repository entries. Remove any conflicting packages, keep a single official Docker repository configuration, and then reinstall Docker Engine before deploying AIO.
Ports already in use
The standard AIO setup requires ports 80 and 443 for web traffic and certificate validation. If Apache, Nginx, Caddy, or another service already uses either port, stop the conflicting service or use AIO’s documented reverse-proxy configuration instead.
Domain, DNS, or TLS certificate failures
The hostname must resolve to the server’s public IP address, and the server must be reachable from the internet on the required ports. Check DNS records, firewall rules, provider-level security settings, and whether a proxy or CDN is interfering with validation.
Containers that remain in a starting or unhealthy state
AIO services may take several minutes to initialize, especially on a new deployment. If a container doesn't become healthy, review its logs in the AIO interface or on the server with Docker’s log command to identify the failed dependency.
Insufficient disk space or memory
Nextcloud needs room for container images, the database, file previews, updates, backups, and user data. Check available storage with df -h and review memory usage before adding resource-intensive features such as full-text search, antivirus scanning, office editing, or call recording.
Reverse-proxy configuration errors
If Nextcloud runs behind an existing proxy, the proxy must support HTTPS and WebSockets and forward requests to the correct AIO service. Follow AIO’s reverse-proxy documentation rather than combining the standard deployment command with an existing web-server configuration.
Administrator account access problems
Use the Nextcloud username created during the initial setup, not the VPS login, AIO passphrase, or domain-provider password. If you lose the administrator password, reset it from the server with the Nextcloud occ command.
Conclusion
Self-hosting Nextcloud gives you a private, flexible way to store, sync, and share files on infrastructure you control. Docker and Nextcloud All-in-One (AIO) simplify initial deployment, but a dependable instance still requires ongoing attention to updates, administrator security, storage availability, and tested backups.
Because those responsibilities depend on the server beneath Nextcloud, choosing VPS resources that fit both the application and its future file growth is part of a successful deployment. At Delta.BG, our Cloud VPS service provides full root access, all-NVMe storage, and on-demand CPU and RAM scaling for self-hosted applications such as Nextcloud. We also include 48-hour snapshots and Layer 3/4 DDoS protection to help support a resilient hosting environment.
If you use Cloud VPS from Delta.BG, you can install Nextcloud directly from our Marketplace without going through all the steps of the initial implementation manually.
For help choosing a suitable Cloud VPS configuration or arranging system administration support, contact us at support@delta.bg or +359 2 4 288 288.